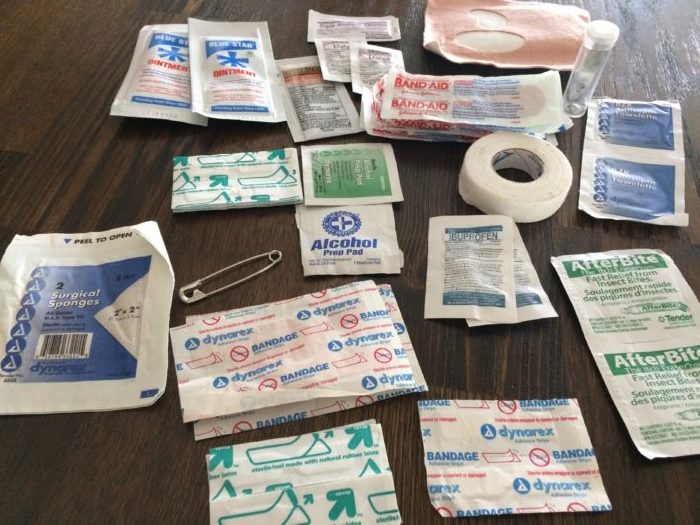
Basic wound care kit.
One of the most important pieces of “kit” for any traveler is the first aid kit — and it’s especially crucial if you are traveling in undeveloped countries, remote destinations or away from metropolitan areas. The smallest scrape, cut or ache can spiral into an infection (or worse!) remarkably quickly, and it pays to be able to take care of yourself and, if needed, others in your party. From the basics such as band-aids to a selection of medications, it’s well worth stocking up a basic first-aid kit and tucking it in the bottom of your duffel or day pack. When the time comes, you’ll be glad you did!
Throughout my travels as a photographer and writer, I can’t think of one trip where I didn’t need to delve into the medical kit. From a foot infection contracted from coral cuts while shooting an international campaign on a remote atoll in French Polynesia to a bout of fever-ridden stomach malaise in the Peruvian Amazon, there’s always something. Even traveling in the States, I’ve found myself reaching for the kit more often than not for something as simple as ibuprofen or a bandage.
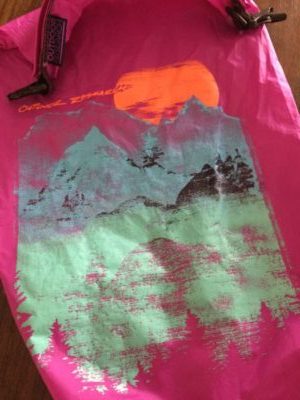
A dry bag holds components and can be clipped to vehicles, boats, etc.
One of the top question categories I receive when presenting and teaching is the “What If?” genre. Sure, people are interested in the technical photography instruction, in the tips and tricks for writing up adventures, but at the end of the day those nagging questions always surface: What If Something Goes Wrong?
And — let’s be realistic here — more often than not, something will go wrong. You’ll get food poisoning. You’ll cut your finger while hiking. Sprain a wrist while lugging heavy bags. Fall from a boat. Things happen and when we’re far, far away from our comfort zones, it’s up to us to identify and then manage the problem.
Do yourself a favor and take a basic first-aid and CPR course (bonus points if there’s a Wilderness First Aid aspect to the instruction). In the heat of the moment the ability to be certain of your treatment decisions and keep a level head is crucial — whether it’s yourself or a colleague that’s injured.
Know-how is the first step. The second step? Make sure you have what you need! In this post and a second part tomorrow, I’ll break down my basic first-aid kit that always travels with me. This is by no means a complete list, nor a one-stop-every-answer scenario, but building this kit has been an evolving project for me over the years and this is what works for my personal needs while in the field, most often in undeveloped areas where little or no medical care is within reach.
A note on organization: as you’ll see below, I prefer to keep my kit in the modular style; labeled, purpose-sorted baggies housed in a larger, waterproof bag. This saves the trouble of sorting through a huge pile of items when searching for one little thing — important when time is of the essence — and makes it easier to see what I need to replace after a trip. Ease of use and consistent maintenance is key.
Top Tip: At the beginning of every trip, talk with your team / fellow travelers and ensure they know you have a kit, and what’s in it. Some people may need fast access to particular medications (an EpiPen, for example, which I do not personally carry) and it’s important to know who has what gear and where it is. If something happens and I’m hurt and unconscious, I want folks to know my first-aid kit exists, and that it’s tucked into a certain place in my camera bag and/or luggage. In areas where snakes or other poisonous creatures are a concern, talk realistically about steps to be taken if someone is bitten… it can be sobering, but it’s important so no time is wasted if and when action is needed.
• The Bag: My kit lives in an Outdoor Research dry bag, brightly colored so it’s easy to find (see image above left). The roll-top bag folds down to a small, compact package and can be clipped onto a day pack / SUP / boat… wherever I need it so it’s handy. It also stays dry should inclement weather arise.
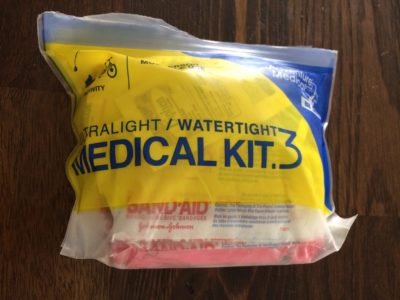
On-the-go basics.
• The Basics: Adventure Medical Kits makes a series of very solid first-aid kits, from one-person single-day kits all the way up to expedition-grade. This little pouch fits my add-ins nicely, while clearly marketing the fact it’s a first-aid kit (important in some parts of the world where baggage will be dug through and examined by customs, etc.) I keep the basics in here and can then pull the little pouch into my day pack, ensuring I’ll have most of what I need directly on my person even when I’m away from most of my luggage.
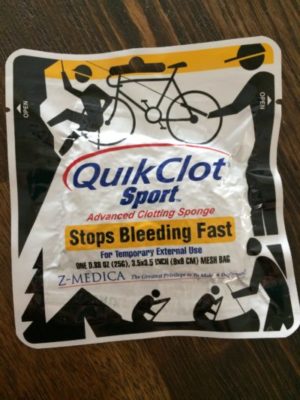
QuickClot packet.
• Keeping Mobile: Everything in the top image fits inside the little zip-top bag shown above. Some of it came in the original Adventure Medical Kit, while much of it I’ve added over the years as needs see fit. With the basics for dressing small wounds and minimal medications, it’s an easy on-hand fix for cuts, scrapes, blisters and the lot, while remaining portable enough to slot easily into my camera bag.
Sponges, band-aids, butterfly bandages, prep pads, moleskin, tweezers, allergy ointment, antibiotic cream, ibuprofen, AfterBite, towelettes and medical tape are just some of the basics to have on hand. You’d be surprised how creative one can get with wound management when the need arises.
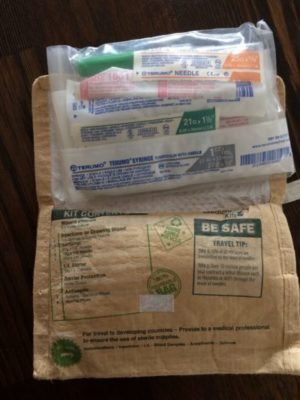
Suture Syringe Medic Kit
• Bleeding: QuikClot Sport is always with me. A military friend turned me onto the original product years ago after he’d used it on deployments; the hemostatic agent stops bleeding quickly until proper medical care can be found. Another military trick: I also carry a tampon or two (sorry, guys) in the medical kit for worst-case-scenario wound management. Not pretty, but stops bleeding quickly.
• Sutures / Injections: Another item I like to keep close, the Syringe Suture Medic Kit from Adventure Medical Kits is ultra-important. In many developing countries (even in the States, more often than you’d think!) medical supplies are re-used and / or not sterile. Having this kit on hand ensures that if I need sutures or injections, I know the equipment is sterile — and many places may not have this equipment on hand to begin with. The contents are sealed in a durable, lightweight, slim-line pouch, adding very little weight and bulk to my kit.
Tomorrow we’ll look at the rest of my traveling medical kit, including bandaging supplies and medications. What are the basics that you’d never leave home without?
* Update: Part 2 is live! Read it here.*






{ 0 comments… add one now }